English
 Русский
 Español
 简体中文
简体中文 لالعربية
Operating Procedures for Small Crawler-Type Shot Blasting Machines
release time:
2026-07-31
Upon receiving the Small Crawler-Type Shot Blasting Machines, please first check
Upon receiving the Small Crawler-Type Shot Blasting Machines, please first check for any damage or missing parts. If everything is in order, please proceed according to the following steps:
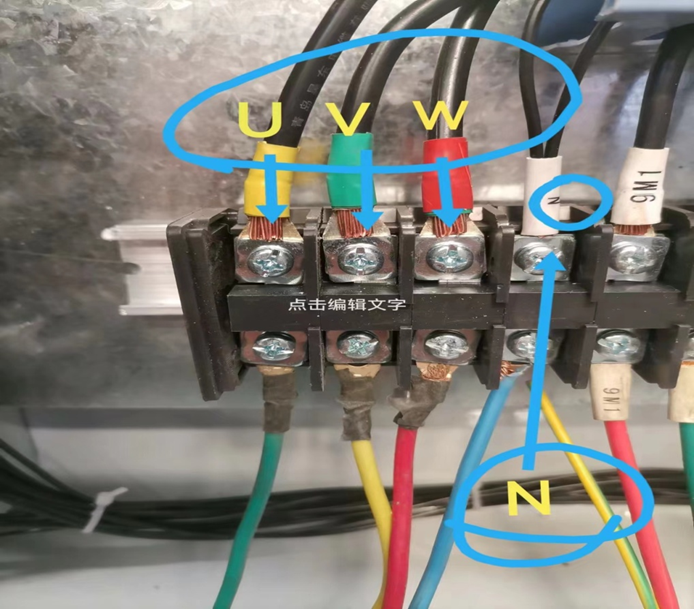
1. Open the electrical control cabinet and connect the Small Crawler-Type Shot Blasting Machines's three-phase live wires and neutral wire.
Connect the three-phase power lines to the "380V Power" terminals and the neutral wire to the "N" terminal. Once connected, turn on the main power switch (using the key); the power indicator light should illuminate. Open the shot-blasting
chamber door and press the "Belt Forward" button on the control cabinet to check the belt's rotation direction (inward rotation indicates forward motion). If it rotates forward, the wiring is correct. If the belt rotates in reverse, disconnect the main power supply, swap any two of the three live wires, reconnect them, and check the rotation again until the direction is correct.
2. Connect the compressed air supply to the equipment (pressure: 0.5–0.6 MPa).
3. Perform a 10-minute no-load test run of the Small Crawler-Type Shot Blasting Machines following the startup sequence below:
Close door → Start fan → Start elevator → Start track (forward rotation) → Start blast wheel → Open abrasive supply valve → Pulse back-blowing Proceed to the next step after 10 minutes of operation without abnormalities.
Follow the steps above in reverse order to shut down.
4. Add steel shot (add according to the requirements for the workpieces to be cleaned) Open the blast chamber door and start the fan; start the elevator; start the conveyor belt in the forward direction; then add steel shot onto the belt—adding approximately 200 kg to 300 kg is sufficient.
5. Before commencing the actual cleaning of the workpiece, adjust the cleaning duration and the abrasive feed rate.
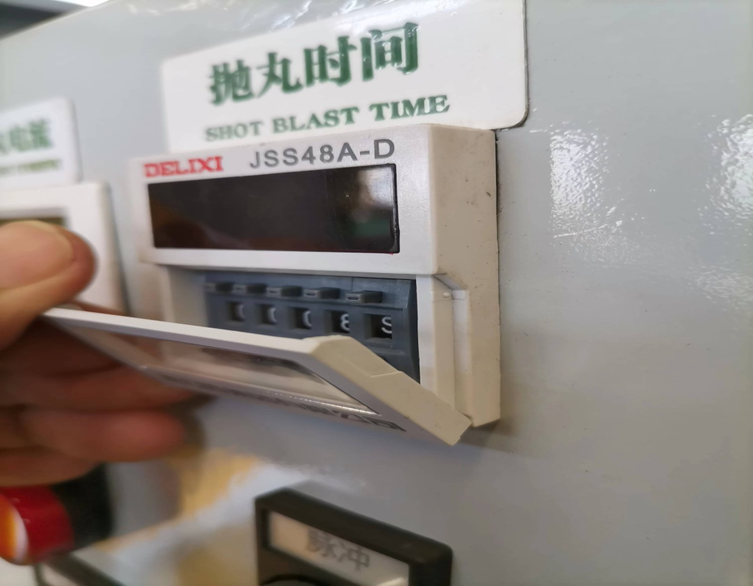
Cleaning duration setting: Adjust the time relay on the electrical control panel before operation—where h denotes hours, m denotes minutes, and s denotes seconds—and set the cleaning time according to the workpiece requirements.
Shot flow rate adjustment: Before startup, turn the shot valve adjustment screw clockwise to set the valve to its minimum position. Close the blast chamber door and start the machine following the proper sequence. Then, turn the adjustment screw counter-clockwise to gradually increase the flow while monitoring the ammeter reading; once the current reaches 12–13 A, lock the setting in place with the lock nut.
During subsequent production, make adjustments as needed based on the ammeter reading, ensuring the current does not exceed a maximum of 15 A.
6. Test Run with Workpieces Open the blast chamber door, load the workpieces into the chamber, and close the door securely. Set the desired blast time and start the machine to perform the blasting operation following the startup sequence described above. Once the process is complete, open the door and remove the workpieces manually, or use the "belt reverse" function to unload them; the blasting cycle is then finished.
7. Precautions:
7.1 Adjust the angle of the blast wheel's directional sleeve; the angle should be set at approximately 10 degrees relative to the direction of rotation (observe the uniformity of the shot blast pattern on the workpiece).
7.2 Check the elevator belt for looseness after a period of operation and adjust it promptly if necessary.
7.3 Regularly inspect the blast wheel blades and liners for wear; replace them immediately if damaged.
7.4 Periodically stop the fan and activate the pulse back-blowing system. Whenever production conditions permit, run the back-blowing cycle for a few minutes after each cleaning process to prevent excessive dust accumulation on the filter cartridges, which could impair dust removal efficiency and reduce the service life of the cartridges.
label:
related news